


How to Use System Restore On Windows 10 [Easy Steps]
Welcome to our guide on How to use System Restore on Windows 10. Have you ever met with a situation where you have installed a new driver and it got corrupted and lead to the failure of OS? If yes, then thought may have struck on your mind, “What if, I can roll back the time to a state where my PC was working smoothly.” Your thought can be real if you are accessing Windows 10 OS. Yes, you heard it right, Microsoft offered Windows 10 System restore feature that enables the users to restore their PC at the previous state where it was working.
System restore on Windows 10 is a tool that must be utilized by every user to avoid the failure of OS amid installing software or due to corrupt driver/system files. So, if you are a Windows 10 user and wondering how to restore Windows 10, then follow the steps listed beneath to enable and create a System restore point.
The Basic Steps to Enable System Restore on Windows 10
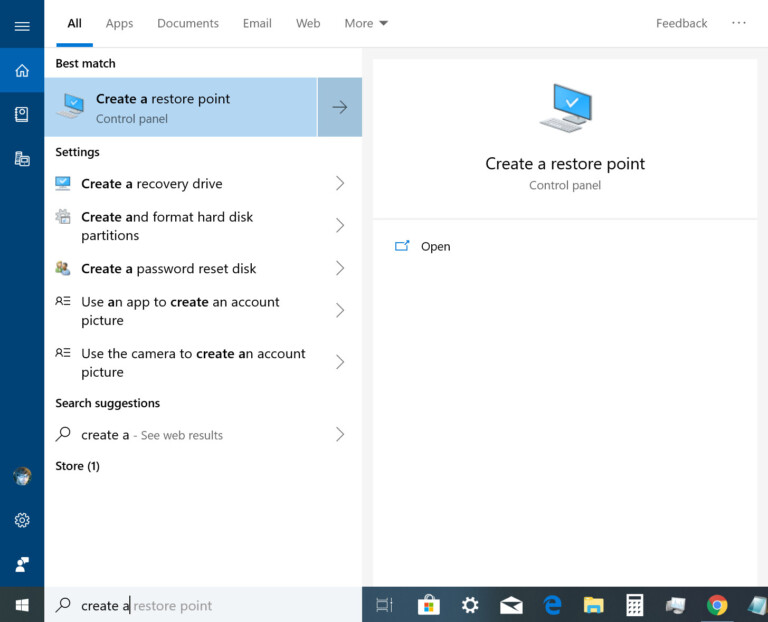
- Press the Start button, type create a restore point on the search bar and then press the Enter key.
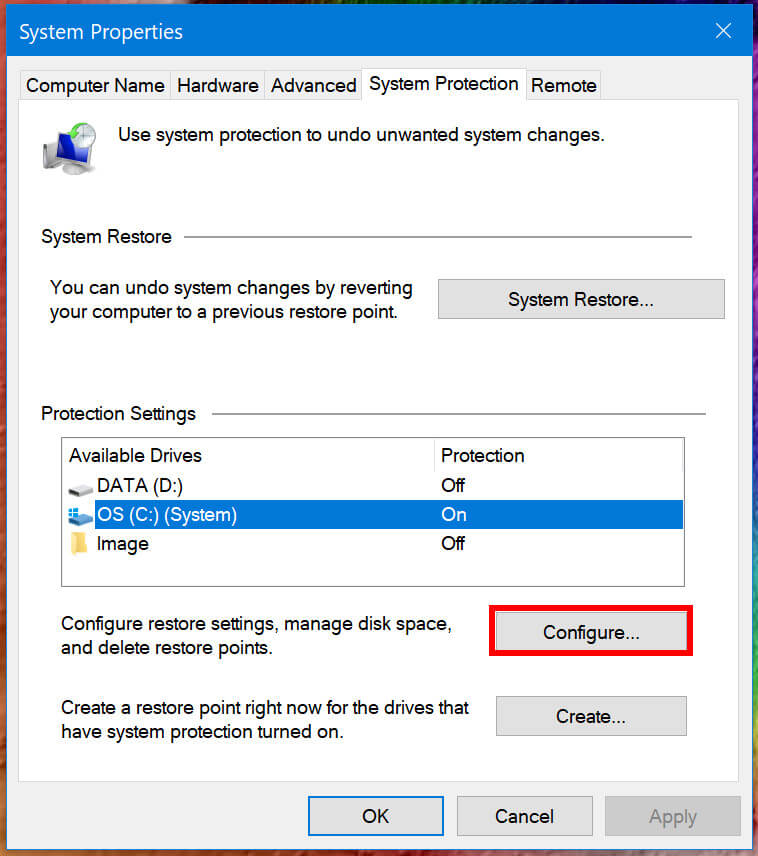
- Thereafter, the System Properties window will open and you need to select the system drive, i.e. (C:).
- Then, click on Configure button located at the bottom of the page.
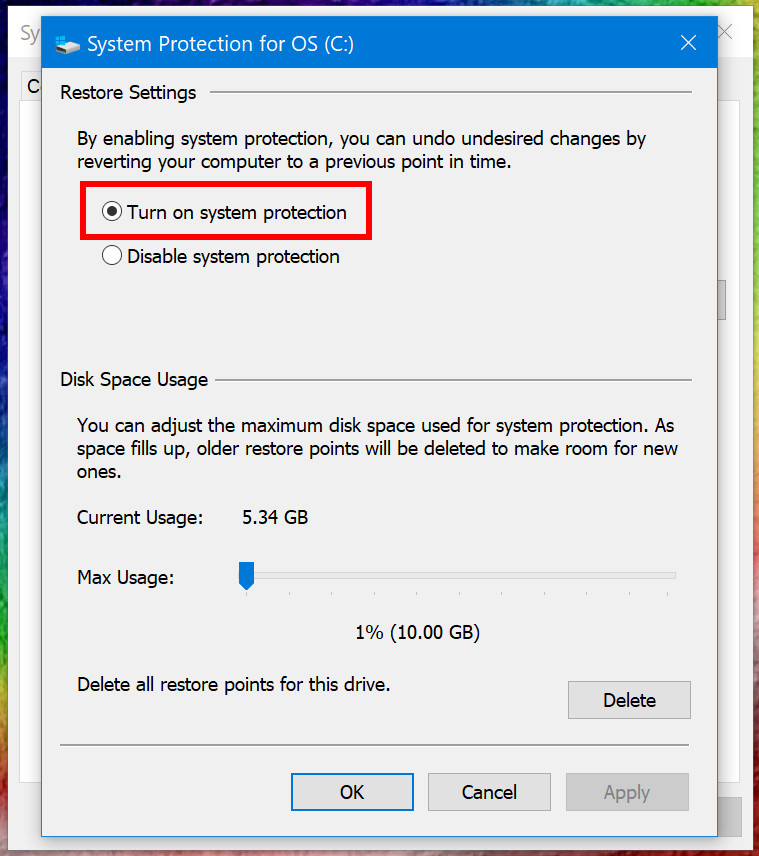
- Soon, another window will open that will provide restore settings, click on ‘Turn on System Protection‘ and then use the Max Usage slider to provide the space to system restore feature.
- After providing the space, click on the Apply button and further click on the OK
So, that was all about to enable system restore Windows 10. After reaching this level, you need to create a restore point and for that, follow the steps listed below.
How to Create a System Restore Point on Windows 10
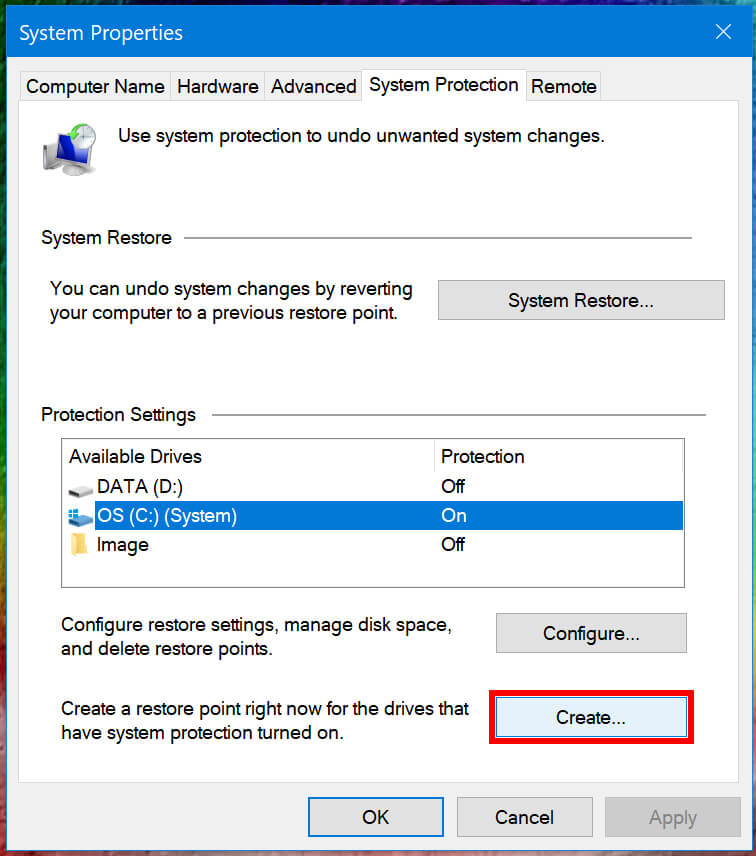
- Click on the Start menu, type create a restore point and then press the Enter key.
- Again, System properties pop-up window will open and here you need to select the drive that you have enabled in the previous step.
- After selecting the drive, click on Create button that is located at the bottom of the window.
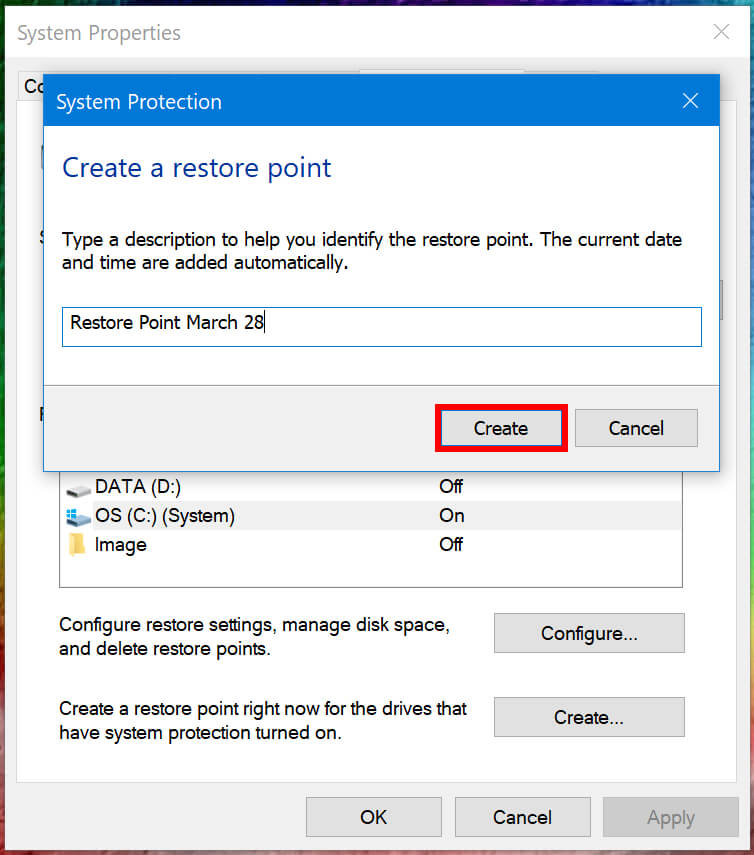
- Thereafter, the System Protection window will open, move to Create a restore point section and provide the description to better identify the restore point. However, if you leave this field then by default date and time will be selected.
- After providing the details, click on the Create
Well, you have reached a half-mile and now you are much aware of the windows 10 system restore feature. You have enabled and created a system restore point and now you must know how to restore Windows 10. The detailed method for the same is listed below.
An Easy and Efficient Way to Restore Windows 10
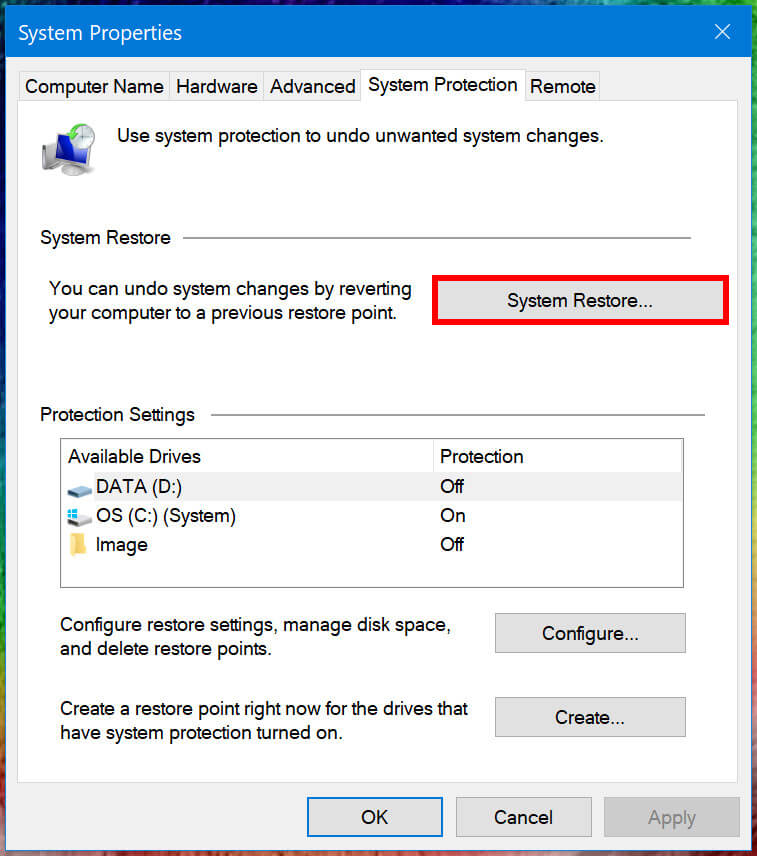
- Press the Start button, type create a restore point in the search bar and then press the Enter key.
- Soon, a new pop-up window will appear on the screen and you need to click on System Restore button that is listed beneath System Restore section.
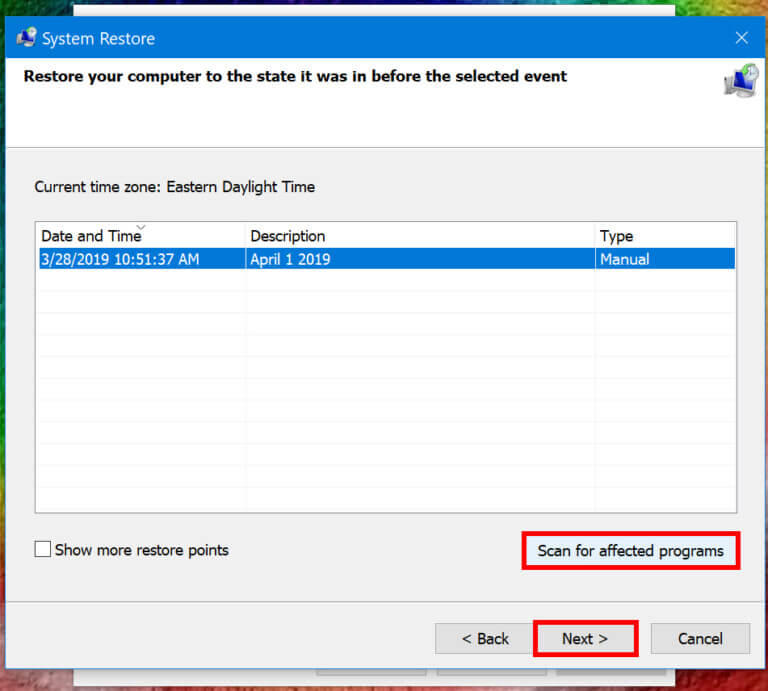
- Thereafter, System Restore window will open and you need to click on the Next button to proceed ahead.
- After that, you will find the restore point that you have created earlier, select it and then click on the Next button.
- Now click on the Finish button to complete the task.
Well, the above method works fine when you can access Windows 10. What if, your PC failed to start and this is the correct situation, where you can use features of system restore on windows 10. Now, follow the steps provided below.
How to Restore Windows 10 When PC Fails to Start?
- First and foremost, turn off your computer.
- Now, press the Power button to turn it ON.
- If you find the Windows logo on the screen, then press & hold the power menu for some time to turn it off completely.
- Repeat the above task for a couple of time and after that, you will find the Windows recovery options on the screen.
- Select Advanced options and after that, you will get three additional options, select Troubleshoot.

- In the Troubleshoot section, you will find Advanced Options, click on it.
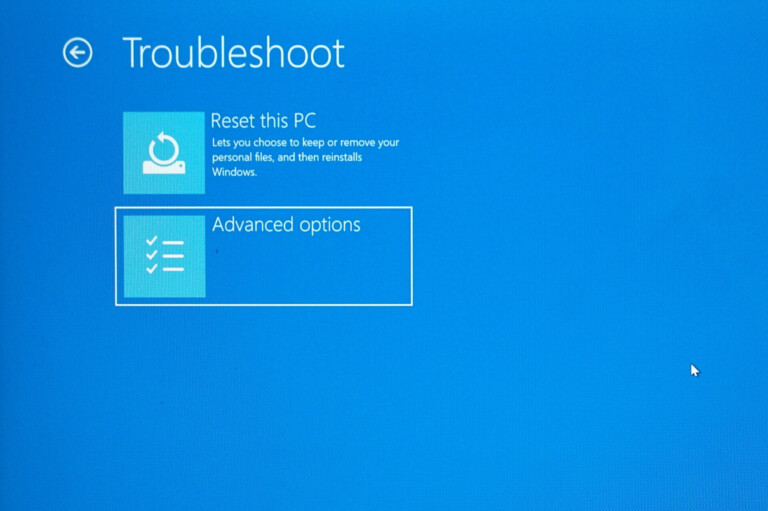
- Thereafter, you will find ample options on your screen and you need to click on System Restore.
- Soon, you will be asked to choose an account, do the same and then enter your password to proceed ahead.
- The above step will direct you to System Restore window and you need to click on the Next button.
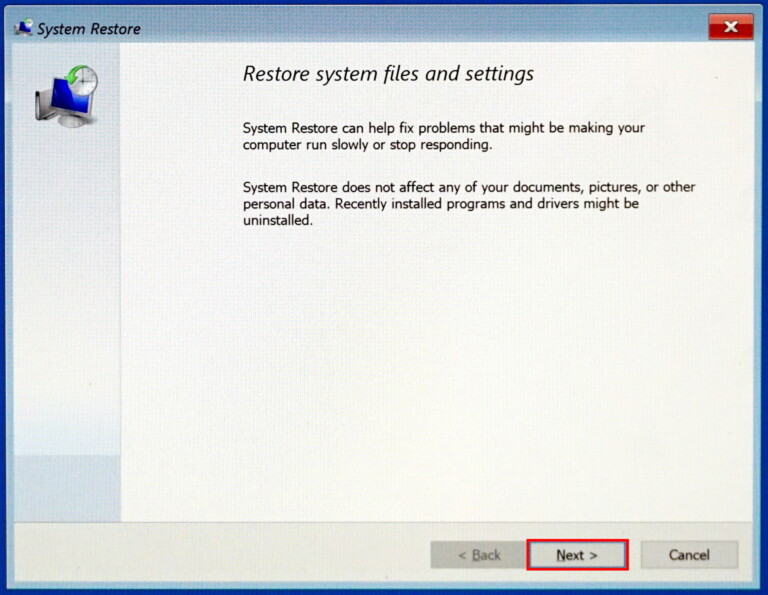
- After that, you will find the list of restore points, select the one and click on the Next button.
- That’s it; now click on the Finish button to accomplish the task.


0 comments:
Post a Comment