Breaking News

Saturday 23 July 2022

How to use Filters & Effects in Photoshop


Basic Photoshop Photo Filters

Filters are like “layer styles” in Photoshop

They have various types of combinations and effects which you can apply.

There are number of designers who uses filter and work with them very deeply and come up with many creative combinations and images.

Here I have an image on which I’m gona apply different filters to make it more effective.
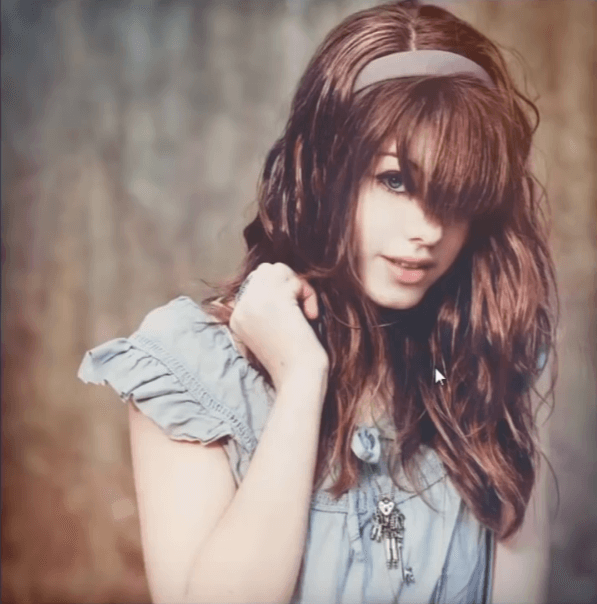
Photoshop filters

Apply a filter from the Filter Menu

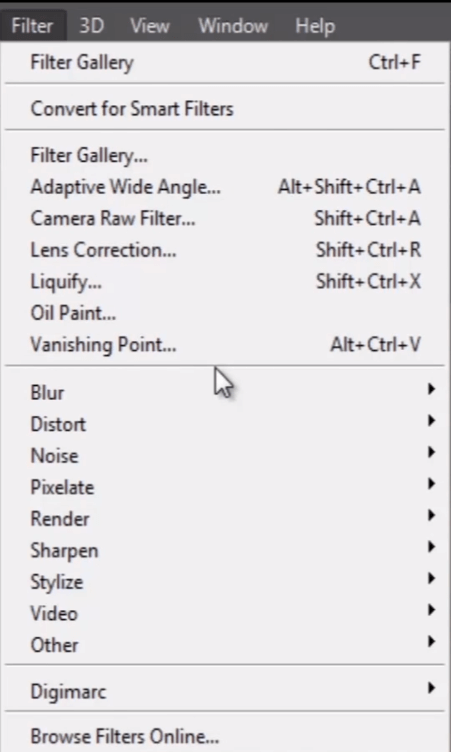
Look here in the “filter” menu. Here you have a bunch of different categories of filters.
Photoshop filters


I suggest you, Instead of paying attention on filter names, you should apply them one by one and check what they are really doing with your image. Because the output of any particular filter is totally depends upon the image on which you are working.

Here we have “blur” , “distort” , “noise” , “stylize” and much more groups of filters.

Filter Gallery overview

“filter gallery” is the option where we can see the preview of all the effects of filters before we apply them.

Photoshop filters

Look, here is the list of filters which we have seen before in filter menu.

You can also apply same photoshop filter effects from this dropdown list which contains all the filters together in a single list.

Apply filters from the Filter Gallery

Let’s try some filter effects for our image.

Make sure, this eye must be on, so that we can see the preview of every filter effects on the image in preview panel.

Now just click on the filter, which you want to apply on image.

You have to do experiment with every filter to find proper effect for your image, because filters give different output for every different image.

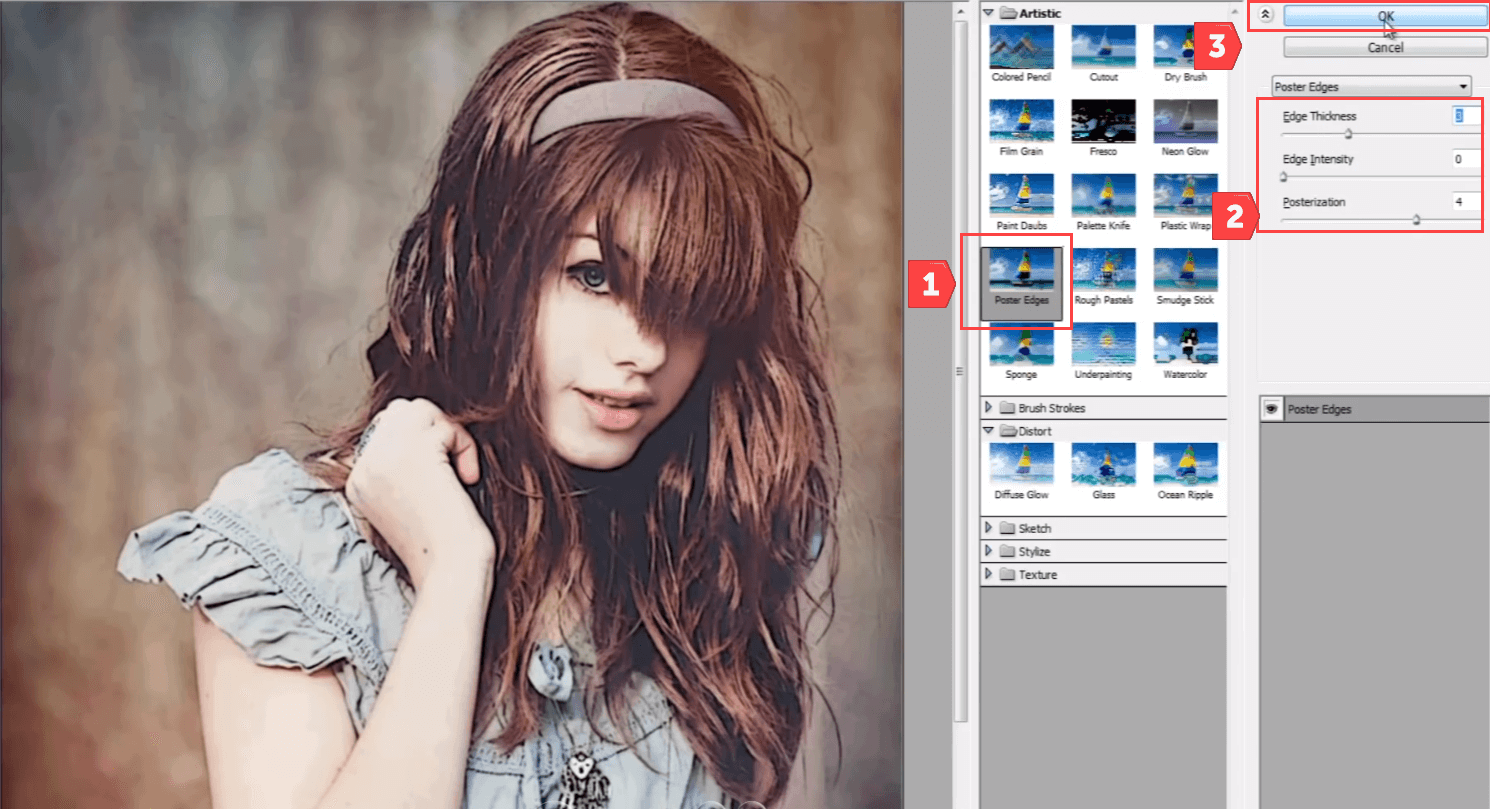
Let me try “poster edges” filter.
Photoshop filters

Here you can see some options to modify the effects of selected filter.

See the changing effects in preview panel when i drag these options left and right.

Finally when you have done with experimenting filters just hit “OK” to apply the final effect to the image.

So you can notice the difference in our image after we have given filter effect in filter gallery. It have sharpened all edges and made the image look like it is painted.

Improve filter Performance

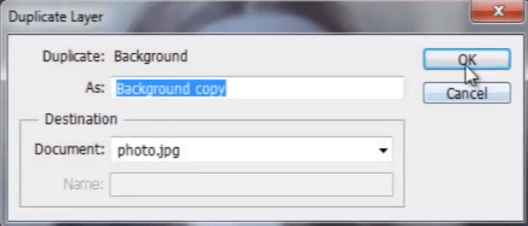
Let’s try to make this image more effective. For that let me take a duplicate of the layer.
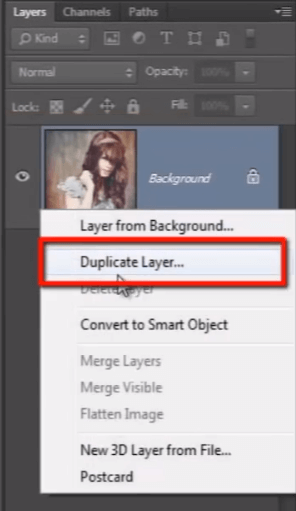
Photoshop filters

Photoshop filters

You can see here a set of different blur filter effects. I choose “gaussian blur”. It will blur the whole image.
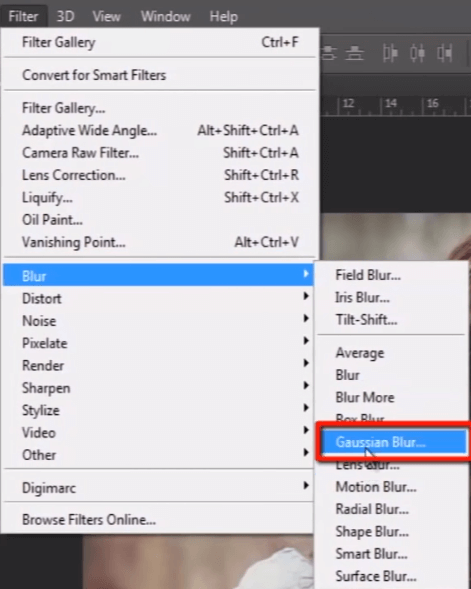
Photoshop filters

Set its value around 3 or 4 and hit “ok”.
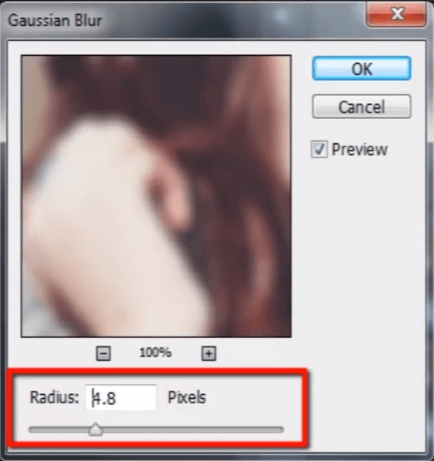
Photoshop filters

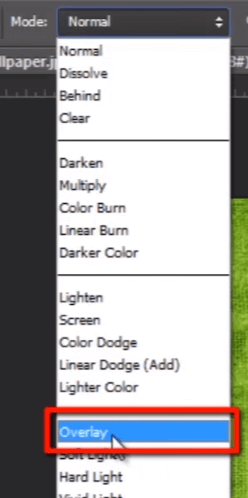
Now change the blending mode of this blurred image to “overlay”.
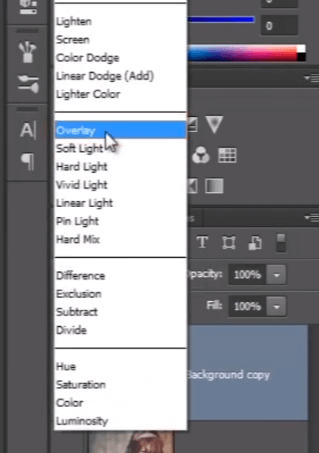
Photoshop filters

You can see how the feel of the image is improved. before we have given any effects to the image, it was a very dull image. But now the colors and feel of the image have improved very much.
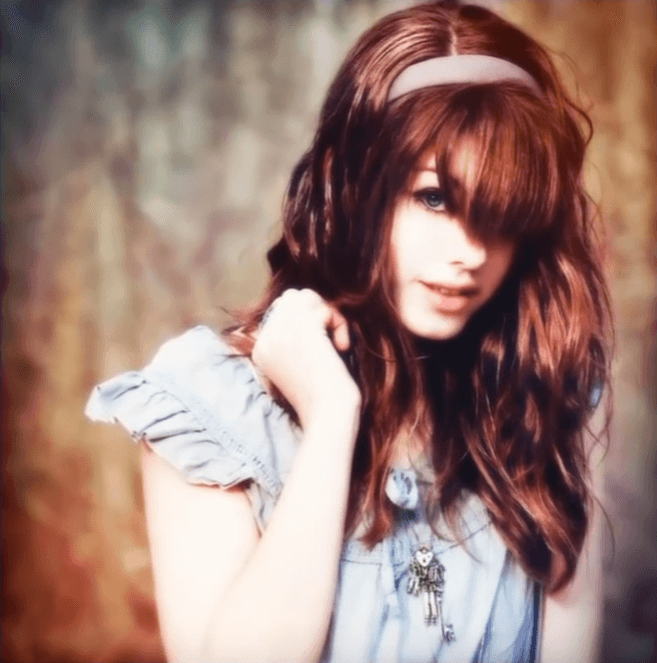

Photoshop filters

So I hope you got the basic idea of filters, how we can use them and how they can help us to raise our creativity.

Guys this was the last lesson of our course of “photoshop CC for biginers” with “guru99”. thank you for watching and I hope you have enjoyed this course.

Friday 22 July 2022

How to use Photoshop Text Tool to add Text


Basics of Photoshop Text Tool

In number of ways you can use “text” while designing in Photoshop.

So let’s grab the “Text tool” photoshop from the tool bar.

Photoshop text tool

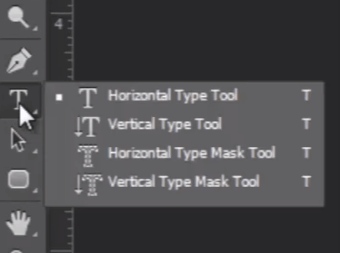
If you click and hold on text tool you can see various types of text tools , like “Horizontal type tool” , “Vertical type tool” , “Horizontal type mask tool” and “Vertical type mask tool”. But most commonly we will use the “Horizontal type tool”.

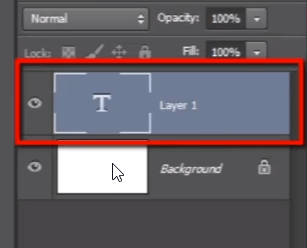
Now just click on the canvas and see in the layers panel a blank text layer is created.

Photoshop text tool

Let me type “Guru99.com (free online education)”.


To make selection of text just double click on the text layer.


Look here in options bar for some options to modify the text.

Photoshop text tool

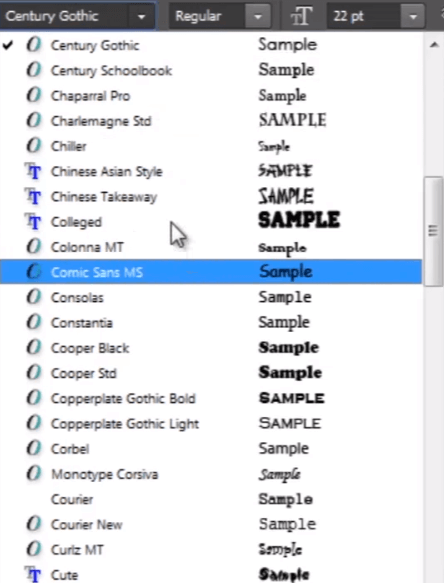
1) Here you can change the font styles of the selected text. There is a huge list of font styles.

2) Here you can give some normal font effects such like “Bold”, “Italic” and “Regular”.

3) By this option we can set font size. You can click and drag on this icon to increase or decrease font size.

4) Here are some font adjustment options.

5) Click this icon to open “character” panel.

Character Panel

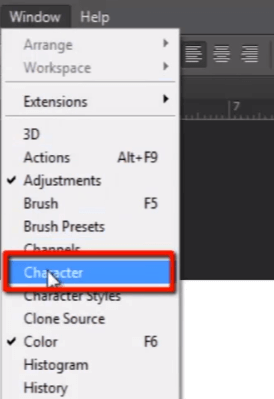
Character Panel contains all the settings for text. We can also get this panel in “window” menu.

Photoshop text tool

In this panel we have same options as we saw in “options bar” and much more options like “kerning” , “tracking” , “vertically scale” , “horizontally scale” , “font color” and much more options you have in this panel to modify your texts.

Now make selection of text by double clicking on text layer and press CTRL + T , to on “show transform”.

You can drag and scale text non destructively.

Notice here the font size of the text, and then scale down the text. when you press enter you can see font size of text is also changed.


You can scale up and down the text as you do with an image, but still not losing the quality after scaling as in image. Because when we scale the text it is not resampling the text, In fact it resizing the text so it can be scaled non destructively.

Now if you want to change font style then select the text and open this list of font styles. You can choose any of the font style from this list. And if you want to check all the font styles one by one then just click on the font style name and keep it selected then start pressing up and down arrow keys to change all fontstyles one by one.

Photoshop text tool

Tracking and Kerning

Let’s talk about tracking and kerning. tracking means spacing between two characters and kerning means spacing between two lines.

Let me change the color of this word so that you can see the difference clearly while changing tracking value.


But first we will change tracking for entire line by click and drag this icon.

You also can set tracking space between two individual characters. for that just click between those two words and put your cursor there and the shortcut to change the tracking value is just hold ALT key and press arrow keys left and right to increase or decrease the space.

You can use same shortcut when you want to change spacing in entire line.

We can also scale our text horizontally and vertically by changing values in “vertically scale” and “horizontally scale” option.

Text on a Path

So now let’s talk about the text on a path.


Let me draw a shape as path so we can put some text on it.

Now just see the cursor. when it’s on canvas area outside the path it looks like normal text tool cursor but when I keep it over the path then it will change. And that changed cursor indicates that your text will be stick to this path.

Now click on that path and you will be able to type your text following on that path.


And you can also determine starting point and ending point of text on the path.

So select the text then press and hold CTRL key then put the cursor at the starting of the text. You can see the changed cursor, now click there and drag the cursor so you will be able to see two different points.

This little cross indicates that this is the starting point of text and the little dot symbol indicates that this is the ending point of the text. So you can’t go out of that limited area.

You can change those points by holding CTRL key then click and drag them.

You can flip up and down the text around the path by moving the cursor in and out of the path area but keep holding CTRL key.

We can also do this thing on simple path drawn by pen tool. so let’s check it out.

Grab the pen tool and draw a simple path.

Now take the text tool, click on the path and start typing.


And you see here, you have same features here what we have seen previously in text over the shape path.

Customizing Font Style

Now let’s talk about customizing font style.

I mean to say that every time font style can’t give you exactly what you want. So in some cases you need to take some texts and modify them as per your requirement.

You can do this by converting the text to path.

Let me type a word “Guru99”. Then right click on the text layer in text panel and choose “create work path”.

It will convert your text to a path that you can easily modify.

Switch Off the text layer and see it have generated a path around the text.


And look here in “paths panel” a work path is created. Save it first.

Now if you want to modify the path then just grab the pen tool and select some control points which you want to move and set them properly as such you have the design in your mind.


You have to hold the CTRL key then click and drag any control point the way you want.

You can see how I have modified the font and created a new design. If I think that I work only with only font style to get my output then it will not gona be success everytime. some time we have to modify the text as per our requirement.

So these are some features about texts in next video tutorial we will gona talk about “filters”.

Thursday 21 July 2022

How to use Brush Tool in PhotoShop?


What is the Brush Tool in Photoshop?

In this tutorial, we will learn about Basics functions of Brushes for Photoshop CC And we will also talk about “brush options” to manage behaviour of the brush in different ways.

Basics functions of Brushes for Photoshop

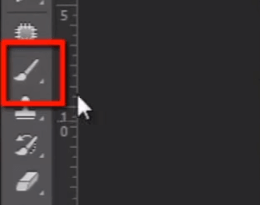
Now go and grab the “Brush tool” from the tool bar.

Photoshop Brush Tool

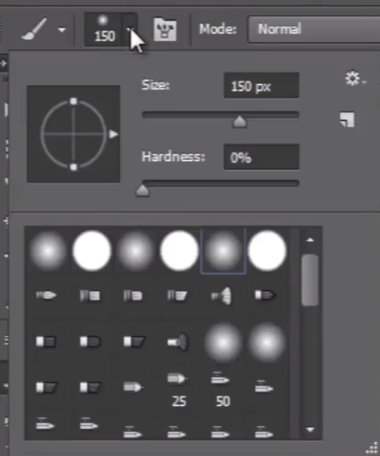
And the first menu in option bar is “Brush preset picker”. Here we can change brush tip, this menu shows different types of icon are actually different types of brushes available.

Photoshop Brush Tool

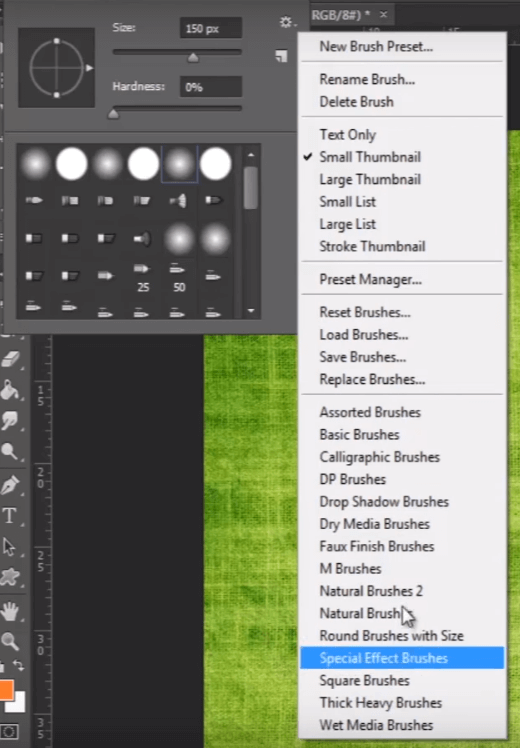
Now click on this small wheel icon. you will get here some list of different group of preset brushes. These brushes are inbuilt with Photoshop.

Photoshop Brush Tool


If you want to add any brush preset then just click on it. I choose “Square Brush”.


Then it will ask you to append brushes or replace them. “Append” means it will add them to existing list of brushes and if you click “ok” then it will replace all brushes together.

Photoshop Brush Tool

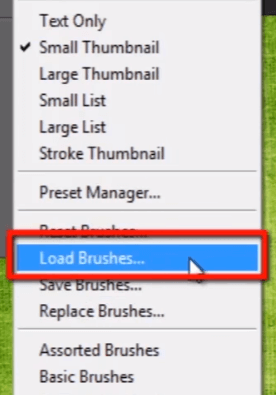
Now if you have set of brushes downloaded from internet by yourself, then to add those brushes you need to go end choose “Load brushes”.

Photoshop Brush Tool

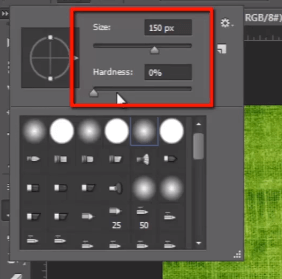
To talk about editing the brush, I’m choosing a soft edge brush here, and you can see right above it “size” and “hardness”. You can set the size of your brush and hardness determines the hardness and softness of your brush edge.

Photoshop Brush Tool

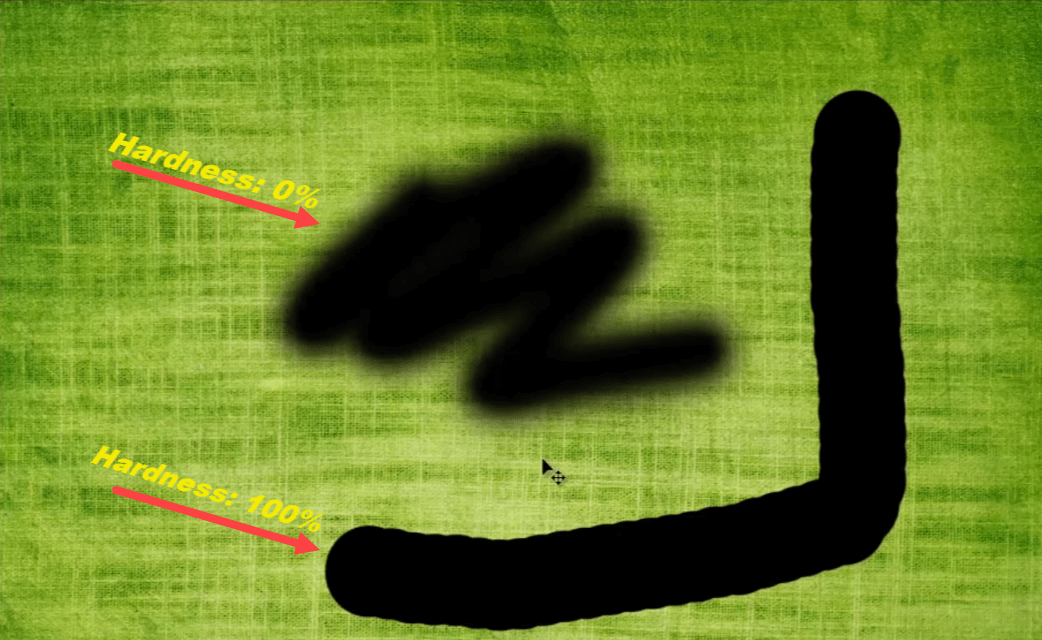
If I keep hardness to 0, then brush will paint with very soft edges.

And if I set hardness on 100, then it will gona paint very hard and sharp edges.

Photoshop Brush Tool

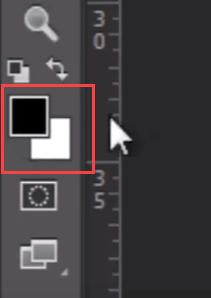
And brush is going to paint the color whatever the color you have set in foreground color. Right now it’s black, but If I choose red color then it will paint with red.

Photoshop Brush Tool

Now one more thing is we can also apply blend modes to brushes. If I choose overlay mode and paint with same red color, then it will gona blend with the background image.

Photoshop Brush Tool

I can also play with it’s opacity. If I want to paint with same color with some transparency then I need to drag down the opacity. And the flow determines in how much area the pixels flow when clicking by brush.

Photoshop Brush Tool

If I want to resize my brush then this is the shortcut to do it. Just press “[“ and “]” to size up and down.

These are very basic features of brush tool but to become more creative we need to go ahead to one more step in advanced by adding behaviours to the brush.

Brush options to manage Behaviour of the Brush

For that I need to go and click on this icon, up in the options menu next to the “brush preset picker”

Photoshop Brush Tool

It will open up the “brush options panel. we also can open it from the “window” menu, and select “brush” to open same panel.

Photoshop Brush Tool

In this panel at the top of the list of options in “Brush tip shape”, we have same options as we have seen before in “brush preset picker” such like “size” , “angle” , “Roundness” , “Hardness” and “spacing”.

Photoshop Brush Tool

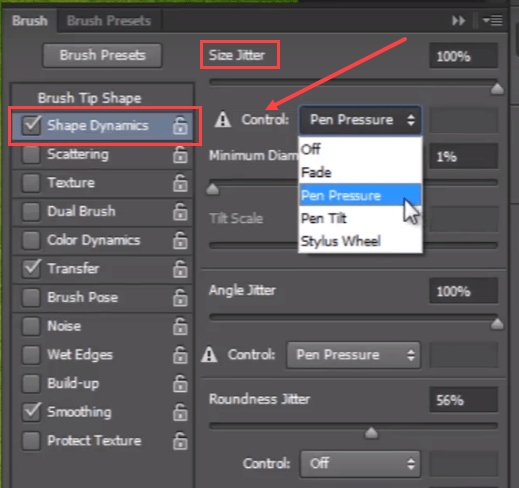
Check on these items below. If I want to change “shape dynamics” then just click on that and you will get it’s options to modify brush behaviours.

Photoshop Brush Tool

Such like “size jitter”. Just keep it in your mind that “Jitter” means it randomize that feature as you paints.

You can also choose different controls such like “fade” , “pen pressure” , “pen tilt” and “stylus wheel”.


Let me change my brush, so you can see the effect of every option when I change it.

You can see this “preview panel” at the bottom of “brush panel”. Where we can see changing behaviours of the brush as you change them.

So you have “size jitter”, “angel jitter”, “soundness jitter” and much more.

Brush will paint as I set different values in this panel.

Next I can scatter the brush. I can increase or decrease count of brush when we paint. And we can set “count jitter” too.

You can see it looks very nice.

Next I can give texture to the brush. For that go to pattern picker and choose any texture you like from texture menu. And modify all other behaviours as per your requirement.

In dual brushes we can use two different brushes at same time with the help of blending modes, and we can modify their size , spacing , scatter and count.

I can add “color dynamics” to my brush, the color of brush will be between foreground and background color, and we need to set hue jitter , saturation jitter , brightness jitter and purity to get proper output.

In this “Transfer” option I can randomize the opacity and flow of the brush. You can see the changes in brush opacity in preview panel.

“Brush pose” is the new feature which is able to modify “tilt” and “rotation” of any brush.

You can use “noise” to give little bit noise effect to your brush.

“Wet Edges”. It will give more natural look to your brush, it can give wet water color look.

Build up allows to build up on the top of it in a natural way you create with real brushes and natural colors.

Smoothing make things more smoother.

And you can protect your texture on images by checking on “protect texture” option.

So you have lots of options and behaviours of brushes,and you can make various types of brush designs everytime and push up your creativity.

Now in the next video we will gonna talk about how to work with “Text” in Photoshop.

Wednesday 20 July 2022

How to Remove Background from Image in Photoshop


Delete/Remove a Background in Photoshop Easily

As a designer, we should know some quick and efficient techniques to extract some particular objects or design element from an image. We will learn them in this tutorial.

How to Remove Background in Photoshop: First Example

Below is a step by step guide to remove background from image in Photoshop with an example:

Step 1) Select Image whose background you want to remove

This is an image of a model with a clean white background, and we want to extract the model and delete background in Photoshop.

Remove Background in Photoshop

We can extract this with the help of photoshop extraction tool like “pen tool,” but it will be a very time-consuming technique. So we can’t use the pen to remove background from image.

Step 2) Chose the Magic Wand Tool and select background

So now go and grab the “magic wand tool” and click on a white background to select it, to add selection area hold “shift key” and click on the portion which you want to add in selection to isolate an image in Photoshop.

Remove Background in Photoshop

Step 3) Apply Inverse

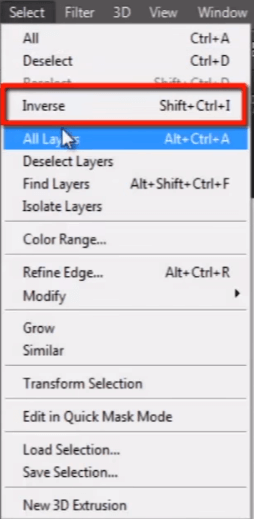
Now we want to extract the model so we have to select her, go to select menu and choose “inverse” so it will invert the selection.

Remove Background in Photoshop

Step 4) Refine Edges

Our selection is made, but still, it is not perfectly selected, because it has very sharp edges selected around it, and some pixel is not selected on edges and some unwanted pixels are selected, so to deal with this problem I’ll click on “refine edges” button, up here in option bar.

Remove Background in Photoshop

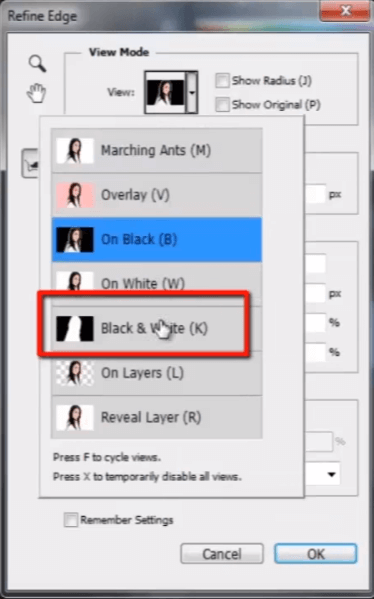
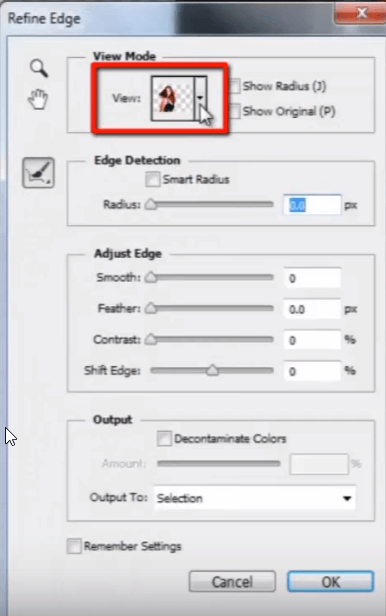
This is refined edge panel. I’m changing the view mode from “black & white” to “on black.”

Remove Background in Photoshop

Because of the black background, we can see what the problem with edges of the model is.

Now start painting on edges of the model and see how it is subtracting some unwanted white color pixels from the selection as shown in the below Photoshop CC remove background example.

Remove Background in Photoshop

I have removed rough edges and made them softer.

Let me change the view mode to “black & white.”

Remove Background in Photoshop

Keep in your mind that black means “transparent” and white means “opaque.”

Step 5) Use the “erase refinements tool.”

Here some part of the model has been transparent, so I need to remove it for that select “erase refinements tool” and correct the selection.

Remove Background in Photoshop

But this is not a big issue so that we can deal with it later.

Step 6) New Layer

You can see here some transparent pixels around the edges of the model in some specific portions. So now change the setting of “output” option. Select “new layer with layer mask” from drop-down list.

Remove Background in Photoshop

Press ok

You can see here in layer panel a new layer is created with a layer mask.

Now see these transparent pixels here. To deal with it duplicate the layer by pressing CTRL + J.

Remove Background in Photoshop


And you can see our problem is solved.

Step 7) Output

You can see with the help of this cool trick we have extracted the model very nicely.

Remove Background in Photoshop

Remove Background in Photoshop: Luminosity Based Extraction Technique

In this Photoshop CC remove background technique, we will talk about “luminosity based selection.”

See here is an image of smoke, in smoke, some portion is full opaque while some part is half transparent. So we want to extract the smoke with proper transparent pixels.

Remove Background in Photoshop

In the previous technique, we have made our selection with “magic wand tool,” but here it will not be the proper technique in the case of smoke.

So here we will use the “channels palet” to erase background in Photoshop.

Remove Background in Photoshop

In channels panel hold the CTRL key and click on “RGB channel” on the top of the channels panel, it loads all the brightness value as the active selection. It has selected the entire white background.

Remove Background in Photoshop

Now go to select menu and choose Inverse.

Remove Background in Photoshop

Then press CTRL + J to create a new layer of the selected portion.
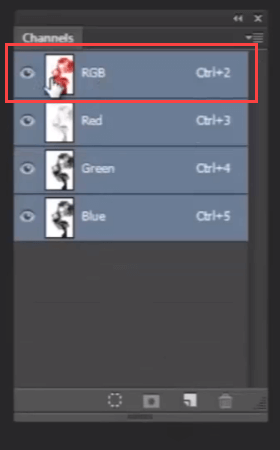
You can see here a new layer is created of the selected area.

But it looks very flat.

So to maintain it’s density select layer and press CTRL + J for around 4-5 times.

And merge all duplicate layers.

Remove Background in Photoshop

This is called “luminosity based selection” technique to delete background in Photoshop.

Photoshop Extracting Objects With Quick Selection Tool

Here is a model and we want to extract her hair very quickly using extract tool in Photoshop CC.

Remove Background in Photoshop

If we use the “pen tool” in this particular image then it will be a time-consuming process, but if we do not need to waste more time on this, we can do this very nicely and quickly with the help of “refine edge” option.

Remove Background in Photoshop

Grab the “quick selection tool” and select the model roughly.

Click on the “refine edge” option.

Remove Background in Photoshop

Select view mode “on layer.”

Remove Background in Photoshop

And start painting around edges of the hair.

You can see how it is refining the selection around the hair.

Look some unwanted pixels are also removed from the selection.

I’ll take out this selection as “new layer with layer mask”.

Remove Background in Photoshop

Look here a new layer is created with a layer mask and the model is extracted very nicely.

Remove Background in Photoshop

Take a duplicate of layer and so that we can deal with some transparent pixels around edges of the model.

Remove Background in Photoshop

So these are some cool and quick tricks for extraction in photoshop cc.