Breaking News

Tuesday 19 July 2022

How to use Pen Tool in Photoshop? Complete Tutorial

 There are numbers of selection tools in Photoshop but the pen tool is the only tool that gives you very clean and sharp selection without blur lines or soft edges because the pen tool uses “vector technology”.

So if you wanna cut any object with clean sharp edges then you must have some knowledge about “Pen tool”. So let’s start with it.

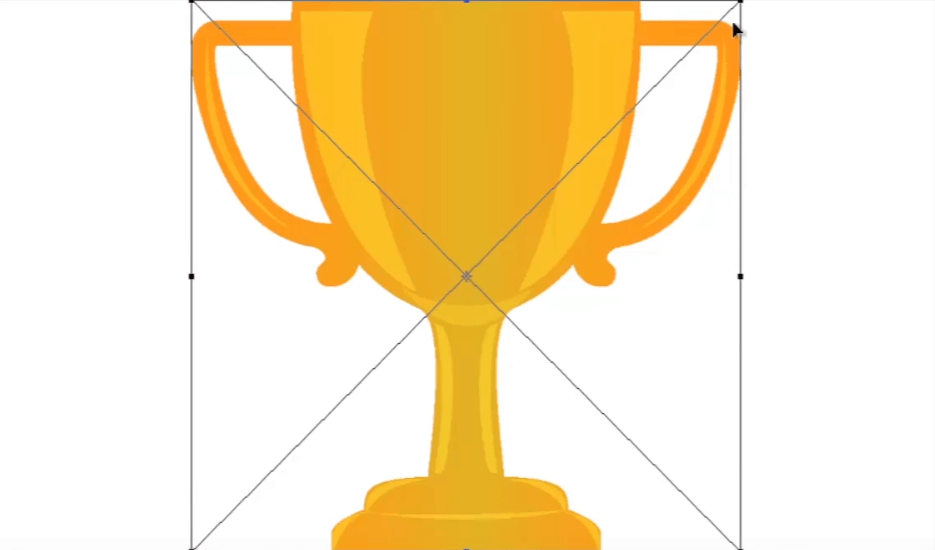
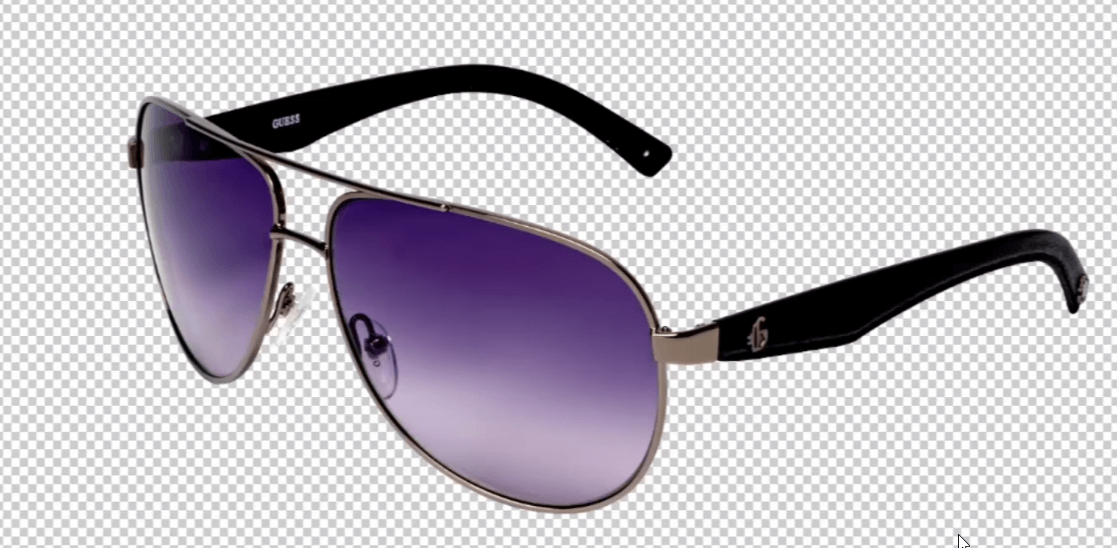
Here is my image and I want to cut out this sun-glass with the help of “pen tool”.

Photoshop Pen Tool

Photoshop Pen Tool


So first go and select the pen tool in tool bar. There are different types of pen tool we can see, but right now I’m using this first pen tool.

Photoshop Pen Tool


When you start drawing path with pen tool, I suggest you to start it from any corner point of the object. and take very few control points.

Photoshop Pen Tool

Now click and drag it, you can see a moving handle of control point, it bends the path as you can see. we can set our path properly with the help of this handle.

Photoshop Pen Tool

Now click and drag for the next control point and bend its handle this way to set it properly.

You can see here the path gets out of line bcz when drawing the previous control point we have bent its handle. so to overcome this problem just hold alt key and click on the last control point before you create a new one. It will remove the handle and allow you to draw the path properly.

Photoshop Pen Tool

Continue drawing the path like this.

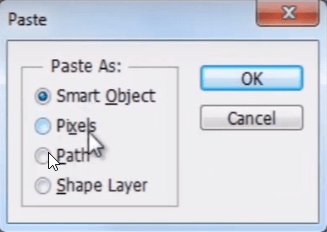
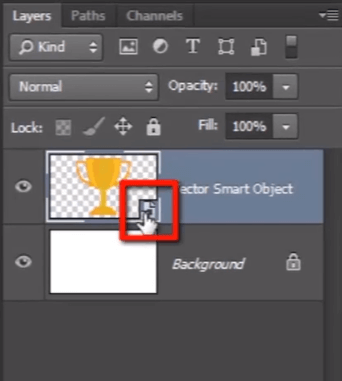
This is the path panel. In this you can see the path you have drawn before some time. Just double click on it and save it.

Photoshop Pen Tool

Photoshop Pen Tool


Here is the path which I have created before. click on it and see at the bottom of the path panel there is an icon called ”load path as selection”, by clicking on this icon you can convert the path into selection.

Photoshop Pen Tool

Photoshop Pen Tool

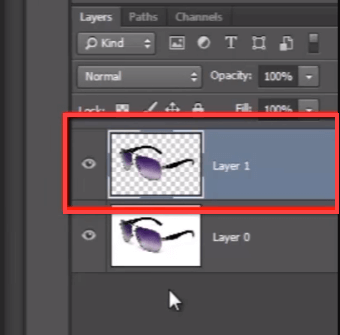
So now select the layer and press CTRL + J to create a new layer of selected portion.

Photoshop Pen Tool

Here I want to cut this hole properly from the path. So I have to go to the path panel and select my path again and see here in the “path finder” options, I have to choose “subtract front shape”.

Photoshop Pen Tool

Now draw the path at the edge of that hole. And select it and delete it.

Let me zoom in here.

Photoshop Pen Tool

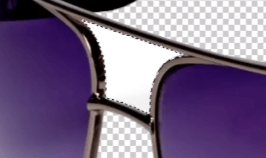
Here you can see the edges of the object are still very sharp. They have not been blurred.

Photoshop Pen Tool

So with the help of pen tool you can get very clean, sharp and accurate extraction, more than any other extraction technique in Photoshop because it follows vector technology.

Monday 18 July 2022

How to Blend in Photoshop: What is Blending Tool & Modes?


What is Blend Modes?

Blend Modes in Photoshop is a tool to blend pixels of two images with each other to get different types of effects. Blend modes is popular among designers. It helps you to correct the photos and convert lighter images to darker or darker images to lighter. It also allows you to create several types of effects for specific images.

How to Blend Colors in Photoshop

Below is a step by step process on how to blend on Photoshop :

Step 1) Select the Image for Background

Here I have a ruff texture image for my background. I will use another image to blend in Photoshop with this background.

Blending Modes in Photoshop

Step 2) Select the Image for whose background needs change.

Let me take another image to blend two images in Photoshop with the background texture.

Blending Modes in Photoshop

So here are two different layers. To apply blending mode, you need to select the layer and open the blend mode list and choose any one of them.

Step 3) Types of Blend Modes

Blend mode menu is at the top of the layer panel, and by default, it is always on normal mode.

Blending Modes in Photoshop

Look there are various types of Photoshop blending modes grouped in various categories in the list. You can choose any one of them and create a different effect using blend tool in Photoshop.

In blending mode list, each group of blend mode has specific functions.

Such as the first section here darkens the image. It effects the overall darkness of the picture.

Photoshop Blend Mode

The second group affects the overall brightness of the image. It allows lighter areas to show through and makes darker areas drop back.

Photoshop Blend Mode

The next group affects the lightness and darkness. I choose overlay here.

Photoshop Blend Mode

The next group of Photoshop blending tool creates inverted effects.

Photoshop Blend Mode

And the last group in the list deals with the colors of the image.

Photoshop Blend Mode

You can also change blend modes sequentially by pressing up and down arrow keys in blending tool in Photoshop.

Step 4) Apply Blend to the Image

“Multiply” is a better option for this image. It gives a striking look to this image.

Blending Modes in Photoshop

We can also get blending modes in “layer style panel.”

For that, let me draw a new shape. Then give some layerstyle to it so that we can check blending modes there in “layer style panel.” Let me check on “outer glow” and set its parameters. Now you can see on top, the same list of blend modes over here, which was in blend mode menu out there in “layer panel.”

You can choose any blend mode you want.

One more thing is you can play with “opacity of layer” when using Photoshop blend tool to get a better result.

See I’m using color burn mode. I liked this blending in Photoshop effect, but it has over-brightened the image. So I can drag down the opacity of the background layer to set the image proper. Now you can see the difference.

Now I hope you got the basic idea of how powerful feature the “blend mode” is.


Sunday 17 July 2022

What is Smart Object? How to use Smart Object in Photoshop?


What is Photoshop Smart Object?

Photoshop Smart Object is never let lose the quality of any vector object or an image, even if we rescale or resample it or change its position or rotate it however we want in our document.

Every designer must know about the benefit of “smart object”.

Means you bring any photographs or any vector objects in your document and you scale it down and scale it up again. In this process of scaling up and down the image, if you do not want to lose real quality of your image then you must make that image a “ smartobject” first.


Let’s see an example so that you can get the actual idea of “smart object”.

Here I have a vector object in illustrator.

I copy this object by pressing CTRL + C. then go to photoshop and press CTRL + V to paste.

When I paste it on photoshop it gives 4 different options to choose such like “smart object”, ”pixel”, ”path” & “shape layer”.

Photoshop Smart object

This time I’m going to select photoshop smart objects.

Press ok.

Photoshop Smart object

So here is our vector object with good quality.

Photoshop Smart object

See there in layer panel the layer have a small icon on bottom corner of it. this small icon indicates this is a smart object.

Photoshop Smart object

Now press CTRL + T and scale down the object.

Press CTRL + T again and scale it up and hit enter.

Photoshop Smart object

You can see here that the quality and sharpness of the object is as much as before we scale it down. it haven’t lose even 1% of quality.

Now switch of this layer and press CTRL + V to paste it again.

But this time I’m going to select pixels.

Photoshop Smart object

The object is in it’s original quality now.

But once we scale it down and scale it up again, you can see how it is losing the real quality of the object. it has been blurred and loss too much color information of the object.

Photoshop Smart object

Let’s see the reason, why the object haven’t lose its information when it is converted to smart object and why it lost them all when it was a normal layer.

Take the smart object layer and scale it down and rescale it up.

You can see it don’t lose any color information and remains sharp and that’s because it’s embedded inside of the smart object which means it is referring to original vector information instead of referring pixel information when it was imported.

And now let’s talk about the object which we have imported as pixel.

When we scale it down it doesn’t need much information to display at this smaller size, so it throws away extra information which are not needed to display.

Now when we are scaling it back up it don’t remember that extra information to which it have thrown away before, when we have scaled it down. so you can see how it have lost its quality and sharpness and how bad it looks.

If you are a designer and you are working on composite design in photoshop, and you are using different objects in your work and you are rescaling, resampling, rotating and repositioning them to get the right look it will going to definitely decrease the real quality of the images if all are not converted to “smart object”.

Photoshop Smart object


Photoshop Smart object

Saturday 16 July 2022

How to Draw Shapes in Photoshop using Shape Tool

 As like pen tool, shape layer also uses Photoshop vector technology.

You will get shape layer tool right here in toolbar.

Photoshop Shape Layer

Now click on that and you can see various Shapes like;

  • Ractangle Tool
  • Rounded Rectangle Tool
  • Elipse Tool
  • Polygan Tool
  • Line Tool
  • Custom Shape Tool

By selecting these items you can draw them as regular path or as a shape layer.


See in the options bar, on the second position you can see a menu. It will show you 3 options to draw your shape like “Path” , “Shape” and “Pixels”.

Photoshop Shape Layer

Now pixel fills the drawn path with pixels, this option does not use vector technology.

And path will draw only path of the shape, it will not fill any color in path.

But here I select shape option and you can see some various options here.

I can select “fill color, stroke color, stroke type” and much more options here.

Photoshop Shape Layer

Now draw the shape and see in layer panel a new layer created there.

Photoshop Shape Layer

You can see a small path icon on the layer. it’s indicating this layer is a shape layer.

Photoshop Shape Layer

Now grab the “path selection tool” and you can click on that. you can see there are some control handles of the vector shape.

If you want to edit color of the shape? Then just go and double click on the shape layer and you’ll get the color picker.

Photoshop Shape Layer

These are vector shapes means they are resolution independent and I can drag and use them in any document and I can scale them up and down without any loss of quality because they are using vector technology instead of using pixel technology.

Lets see a useful aspects of shape tools, the “photoshop custom shape tool”. Which gives you lots of readymade shapes and you can easily use them when you want.

Photoshop Shape Layer

All these shapes are included in this popup menu by numbers of different categories but right now I’m choosing that all. So that I can get all the shapes out there in the list.

Photoshop Shape Layer

Now choose the shape that you want to use.

To draw the shape you can simply click on the work area if you want to draw it with any specific size. or you can also simply drag and draw the shape to create the shape layer.

Photoshop Shape Layer

Let’s edit shape’s color and stroke properties in the options bar at the top.

Photoshop Shape Layer

Now if i want to subtract some part inside this shape. then I’ll go and select “elipse tool” and I’ll go here and set the path finder feature to subtract front shape and

Photoshop Shape Layer

if I draw a circle inside here that’s going to subtract that area from the main shape. i can also change the position of the shape.

Photoshop Shape Layer


So this was a brief overview about the shape layers in photoshop. You can create various kinds of designs with the help of the shape layer without losing any quality because it uses vector photoshop technology.

Photoshop Shape Layer

Now let’s go ahead to our next topic “smart object”.

Friday 15 July 2022

How to use Photoshop Layer Styles & Effects [Example]

 In this article we will learn how to apply Photoshop layer styles and how to share them between layers and how to utilize layer styles to make our content more appealing.

Look in this image I have applied some layer styles to this word


Here you can see some layer styles like “Bevel & Emboss”, ”Stroke”, ”Gradient Overlay” and ”Drop Shadow”.

Photoshop Layer Styles

We can turn them on or off individually or all together.

And this fx icon indicates this layer have applied a layer style.


To apply layer style to a layer you need to select the layer and go to “layer” menu then “layer style” and choose any of the layer styles you want to apply.

Photoshop Layer Styles


And it will open the layer style panel where you are able to edit each and every layer style as per your requirement.

Photoshop Layer Styles

Here I have already applied some layer styles like “Bevel & Emboss” I have got some option in that. I can easily edit them. then I got “stroke” and “gradient overlay” and “Drop shadow” . All this have their own and different customizable options.

If you want to add or subtract any layer style then just click on it.

One another way to apply layer styles is at the bottom of the layer panel. Have a look at this fx icon by clicking on this button you will have same options that you have seen in layer menu.

Photoshop Layer Styles

share layer styles

Now let’s talk about share layer styles between two layers.

So here I have one more photoshop text styles layer “Free online Education”. There are many different ways to share layer styles.

Photoshop Layer Styles

Here is a very quick way. Hold down the ALT key and grab the fx icon and drop it on the layer to which you want to apply same layer styles.

Photoshop Layer Styles

It will copy and paste layer style in one single move.

One another way is just right click on the layer having layer styles and select “copy layer style” and go and right click your target layer and select “paste layer style”.

Photoshop Layer Styles

Now if you think you don’t like this layer styles then you can easily grab “fx” icon and drag it to the “trash”. It will only delete layer styles and not a layer itself.

Photoshop Layer Styles

One more way, you can simply right click on the layer and choose” clear layer style” and it will clear all the layer styles which you have applied on that layer.

Photoshop Layer Styles

One more important thing is you can also detach layer styles from the layer.

For that you simply need to right click on “fx” icon and choose “create layers”. It will create layers for each and every layer styles those you have applied to your layer.

Photoshop Layer Styles

You also can turn them on and off and you can work on them as separate layers.

One more thing about layer style is if the layer style is applied to a text layer then it is easily editable. so go ahead and retype, and you will get same effects on new typed word.